
First impressions are everything, when it comes to your website. You don’t want that first impression to be a lagging loading speed. In fact, according to research by Portent, a webpage that loads in 1 second has a conversion rate 2.5x higher than a site that loads in 5 seconds.
The ideal loading time is between one to four seconds, but for many early on in their HubSpot and web development journey, it can be unclear how to get there. Ultimately, it comes down to the ‘weight’ of different elements on your website.
As a HubSpot CMS developer, I find that a key factor in site speed slowdowns is often due to large images. When not handled correctly, these weighty images directly influence your site's user experience and, consequently, your conversion rates.
As a HubSpot Partner, Vaulted helps clients navigate site speed issues to ensure we can help them tell their stories to the right people. To shed light on the process, we wanted to create this guide to cover the importance of image optimization, specifically focusing on our preferred website-building platform, HubSpot.
Read on to learn about HubSpot image optimization and learn how you can make your website run faster!
The Significance of Image Optimization
Before we dig into the how, let's first understand the why.
Why is image optimization vital for your site speed, and why should you care?
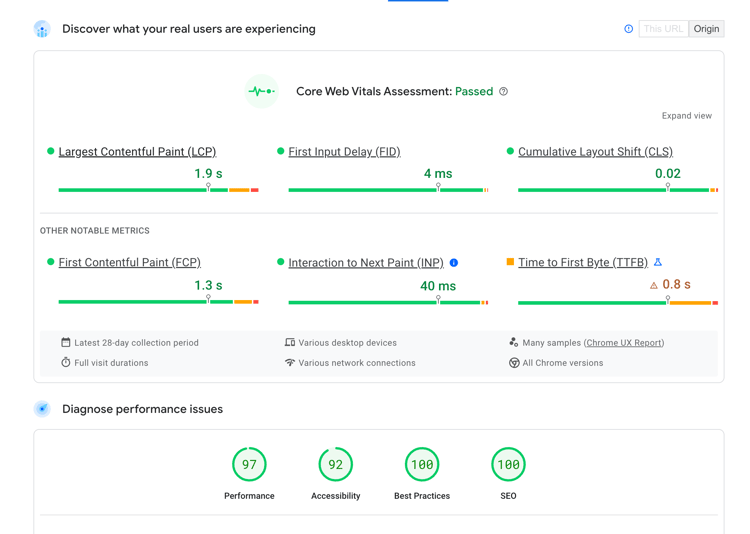
Let’s take a basic site speed image improvement stat: LCP or Largest Contentful Paint. In layperson’s terms, this is the browser's biggest element to render on the page. According to this case study at web.dev, when Vodafone increased the speed of rendering the LCP on one of their landing pages by 31%, they increased sales by 8%.
Image optimization is integral to making websites faster. Optimized images lead to improved page load times, reduced bounce rates, and a better user experience.
Images that are not correctly optimized can considerably slow down your site, and slower sites are known to have lower conversion rates. The equation is pretty simple: a faster site equals higher quality conversions.
Getting Started with HubSpot Image Optimization
If you're a beginner developer or marketer updating pages in HubSpot CMS Hub, here are some specific tips I always follow. These steps will help you ensure your images are correctly optimized and contribute positively to your site speed.
Let's delve deeper into the reasons why each of these steps is crucial for optimizing image loading and contributes to faster site speed on HubSpot CMS Hub Website:
1. Compress Your Images
Image compression is so important to improving site speed. That is because large image files can significantly slow down your website. When you compress an image, you reduce its file size without noticeably affecting its quality. Tools like Tiny PNG efficiently minimize the file size, making the image load faster.
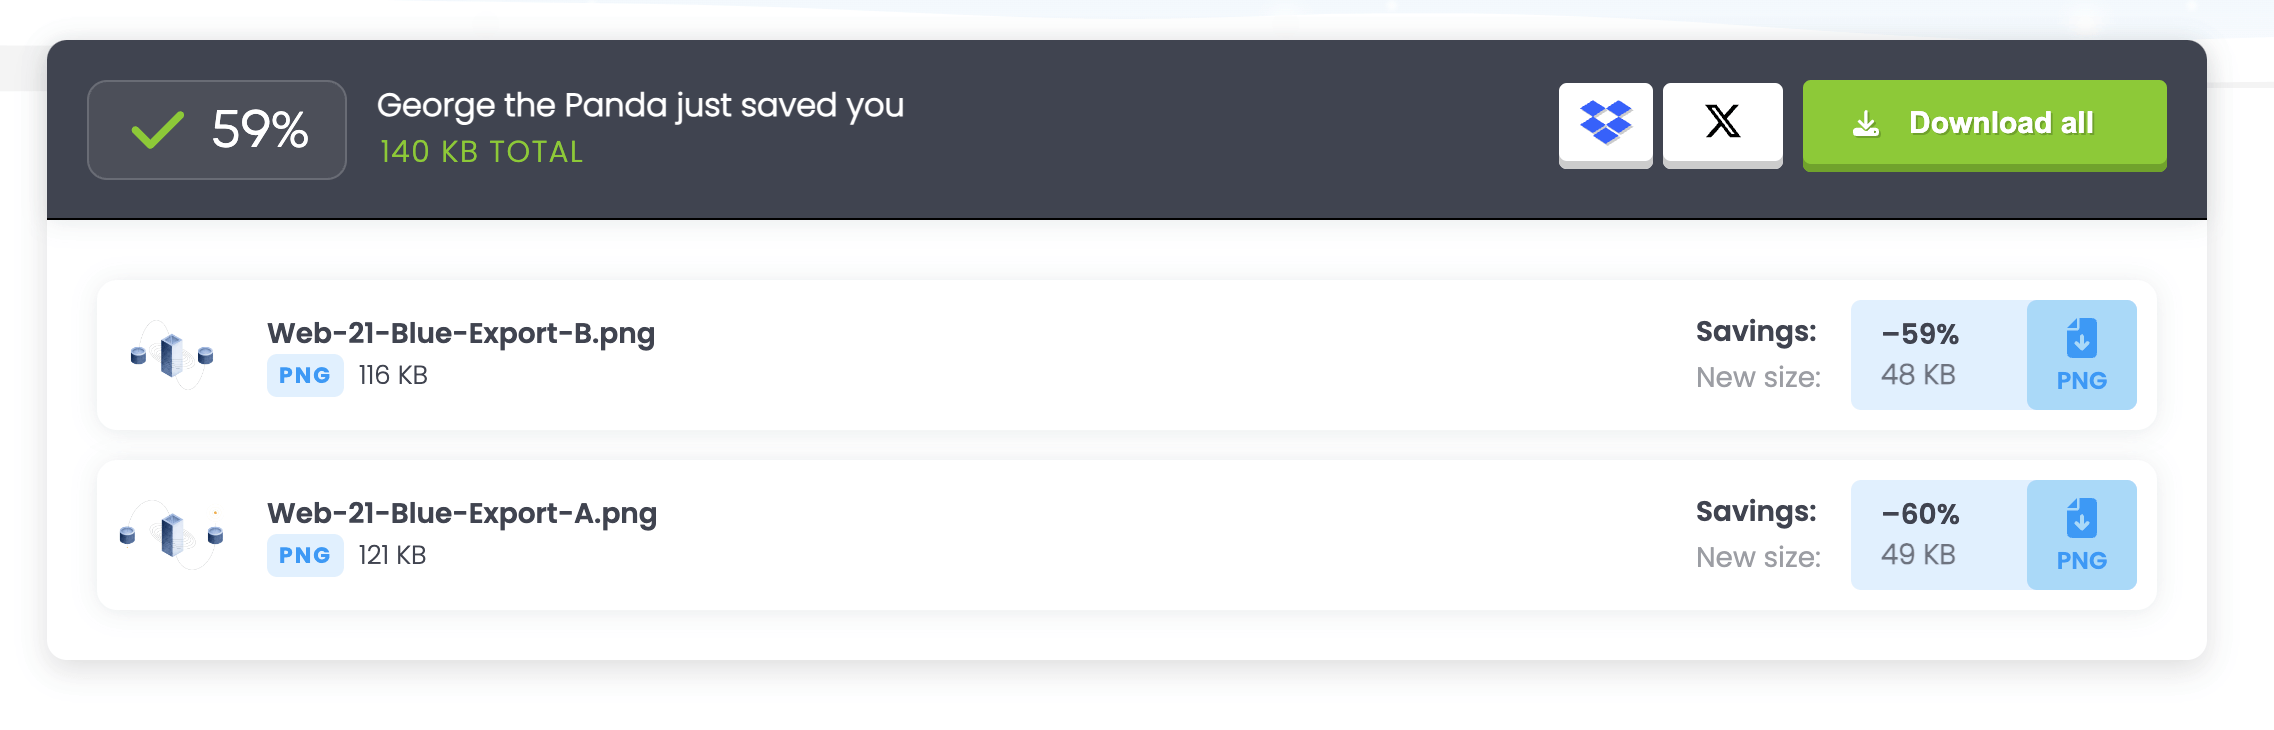
Faster load times not only enhance user experience but can also positively impact SEO rankings. Ultimately, by compressing your images, your website provides a more seamless experience with your customers while also appearing higher in search results.
2. Choose the Right File Format
The appropriate file format is critical for balancing image quality and file size. WebP, for instance, provides superior compression and quality characteristics compared to traditional formats like JPEG and PNG.
For vector graphics, SVGs are ideal as they offer scalability without loss of quality and typically have smaller file sizes. SVGs help your images look crisp without burdening the site’s loading speed.
Choosing the right file type can ensure that your website loads faster while also making sure each image looks its best. This supports usability and ensures your branding is consistently of high quality.
3. Set Height and Width Attributes
Specifying the height and width of images in the HTML helps the browser allocate space for the image before it fully loads. This pre-allocation prevents abrupt layout shifts, which can be jarring for users and negatively impact the Cumulative Layout Shift (CLS) score, a key Google metric.
By enhancing the user experience and improving CLS, you're indirectly boosting your site's SEO performance.
4. Utilizing Maximum Width Settings to Load the Image in the Most Efficient Way
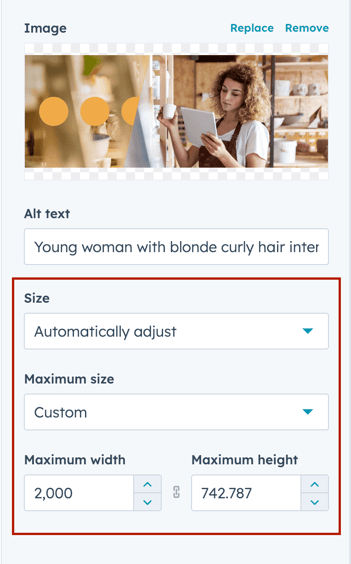
Implementing max-width settings and srcsets is about responsiveness and efficiency. Setting a max-width on your image in the HubSpot editor ensures that images are not larger than needed, saving unnecessary data.
HubSpot will automatically add an attribute called a `srcset` attribute to your image when you add a max-width. Srcsets contribute by allowing the browser to select the most appropriate image size based on the user’s device.
This adaptive approach improves load times across various devices and screen sizes, reducing bandwidth usage and enhancing the overall user experience.
5. Lazy Load Your Images
“Lazy loading” is a technique where images are loaded only when they are about to enter the viewport. This means that images off-screen are not loaded until the user scrolls to them, significantly reducing initial page load time.
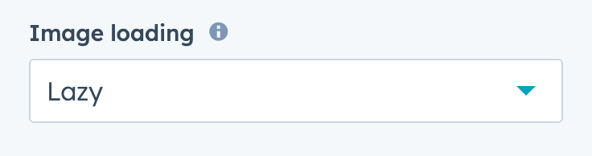
Implementing lazy loading, especially for non-critical images, can enhance site speed and performance. Some HubSpot templates automatically include loading settings when you add an image. This is the easiest way to set the image to lazy load if it’s below the fold on your site.
Lazy loading isn't just limited to images; you can also apply it to iframes, which often contain resource-intensive content like videos or maps. By lazy loading iframes, you defer loading this content until needed, further optimizing the page’s load time.
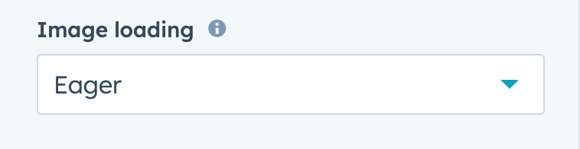
Pro-Tip: The largest or hero image (Your Largest Contentful Paint) should be set to “eager” load to ensure it's immediately visible, balancing optimization and user engagement. Check out this article from GTMetrix that explains why this is helpful.
The Value of HubSpot Image Optimization
Each of these steps, when implemented correctly, works towards the common goal of improving your website's loading speed on HubSpot CMS Hub. This not only enhances user experience but also contributes to better SEO performance.
That’s a win-win for both you and the website user! Enhancing your HubSpot site speed and the overall user experience positively impacts your conversion rates. I highly recommend checking out this article from HubSpot for a more comprehensive understanding.
We hope this guide has helped show the value of optimizing your images and how to do so in the HubSpot CMS. While it may seem technical initially, practicing these steps will gradually become second nature.
Remember, every effort you put into HubSpot image optimization directly contributes to a faster, more efficient website for your end user. A faster site is a surefire way to attract and retain your audience, ultimately leading to higher-quality conversions.
As always, if you need further assistance with HubSpot services or any other aspect of your digital marketing strategy, don't hesitate to reach out to our team at Vaulted. We're here to help you navigate the complexities of digital marketing so you can focus on what you do best—growing your business.
In the meantime, happy optimizing!
Discover More Insights
Watch: Our AEO Session from the Raleigh-Durham HUG
This is the replay of our first Raleigh–Durham HubSpot User Group session, Answer Engine Optimization: Search changed. Did you? The core reframe: AEO isn't about earning the click anymore — it's about earning the citation. AI engines increasingly answer your buyer's question outright, without ever sending a click your way, so the job becomes being the passage they quote and credit, not just the page they rank. And the biggest lever isn't even on your own site — branded mentions and earned media correlate with AI visibility roughly 3x stronger than backlinks.
 Matthew Deal

Answer Engine Optimization, Tested: What 471 NC B2B Sites Reveal About Getting Cited
We relaunched the Raleigh-Durham HubSpot User Group with a live session on AI search—and to back it up, we audited the websites of 471 North Carolina B2B companies and ran 22 real buyer questions through an AI answer engine. The result: 96% of those sites are perfectly readable by AI crawlers—access was never the problem—yet on the questions their own buyers would ask, the companies were cited almost never. The answers went to Reddit, G2, Clutch, and the trade press instead. Answer engine optimization (AEO) isn't about unblocking crawlers or adding schema. It's about becoming the citable authority for a narrow category, and earning mentions in the places engines actually pull from. The full session is below, and the data is in this post.

Does HubSpot Marketing Hub Support Multi-Channel Marketing Campaigns?
What “multi-channel” means in HubSpot A multi-channel campaign in HubSpot isn’t five disconnected tools wearing a trench coat. The Campaigns tool ties your assets (marketing emails, social posts, ad campaigns, SMS sends, landing pages, blog posts, CTAs, forms, and workflows) to a single campaign object, so performance rolls up to one report instead of five spreadsheets.